1. Get the WSDL and XSD files of the webservice you need to implement.
Eg. For my webservice, I needed:
parlayx_terminal_location_notification_service_2_2.wsdl
parlayx_terminal_location_notification_interface_2_2.wsdl
parlayx_terminal_location_types_2_2.xsd
parlayx_common_types_2_1.xsd
2. Use WSIMPORT to generate the code stubs
Eg. command I used:
F:\EclipseWorkspaces\MANDPLBS\MAWS_Stubs>F:\Apache\jaxws-ri\bin\wsimport parlayx_terminal_location_notification_service_2_2.wsdl -keep -s src -d build\classes
I generated the source files in src and clases in build\classes so that I can use this directory as a project directory in Eclipse workspace
When you run it, you will see:
parsing WSDL...
generating code...
compiling code...
3. Amend the source files to implement your logic.
- Most of wsdl will generate an interface class
- You might want to implement that interface using a different class
- Eg. My interface class: TerminalLocationNotification
My implementation class TerminalLocationNotificationImpl
- If you change the package name, you will need to change the classname annotations
4. You can rename the classes but each object must be defined in ObjectFactory
Note: When I didn't comment out the classname wsgen (next step) created another package with jaxws
5. Generate the WSDL and artifacts using the following command:
>D:\Apache\jaxws-ri\bin\wsgen -cp ../build/classes -r ../WebContent/wsdl -s . -d ../build/classes -keep com..lbs.server.TerminalLocationNotificationImpl -wsdl
-r to generate WSDL to the right dir
-s to generate the source files to the right dir
-d to generate the class files to the right dir
6. Export as war and deploy on app server.
Tuesday, May 26, 2009
Monday, May 25, 2009
Thursday, May 21, 2009
Changing Glassfish default ports
By default, Glassfish will run on port 8080 (HTTP), 8181 (HTTPS). To change the ports, you can
1. Change setup.xml (if you have not created the domain)
2. Change domain.xml (if you have created the domain). This file is found in glassfish/domains/domain1/config/domain.xml
Look for the following line:
And change 8080 to your new port.
1. Change setup.xml (if you have not created the domain)
2. Change domain.xml (if you have created the domain). This file is found in glassfish/domains/domain1/config/domain.xml
Look for the following line:
And change 8080 to your new port.
Installing Glassfish on AIX
At this point in time, V3 is not available on AIX, so I will be using 2.1
1. Install JDK 1.5 or 1.6. You can download this from IBM AIX website.
2. Download Glassfish bundle from here. For AIX, downloaded glassfish-installer-v2.1-b60e-aix.jar size (61M). Note: ml stands for multi-language
3. Run the following command
% java -Xmx256m -jar glassfish-installer-v2.1-b60e-aix.jar
This command will unbundle GlassFish and create a new directory structure rooted under a directory named 'glassfish'.
4. CD to the glassfish subdirectory.
% cd glassfish
5. Set the execute permission for the Ant binaries that are included with the GlassFish bundle.
% chmod -R +x lib/ant/bin
% lib/ant/bin/ant -f setup.xml
6. On AIX, you may run into the following error:
create.domain:
[exec] Using port 4848 for Admin.
[exec] Using port 8080 for HTTP Instance.
[exec] Using port 7676 for JMS.
[exec] Using port 3700 for IIOP.
[exec] Using port 8181 for HTTP_SSL.
[exec] Using default port 3820 for IIOP_SSL.
[exec] Using default port 3920 for IIOP_MUTUALAUTH.
[exec] Using default port 8686 for JMX_ADMIN.
[exec] Domain being created with profile:developer, as specified by variable AS_ADMIN_PROFILE in configuration file.
[exec] ------ Using Profile [developer] to create the domain ------
[exec] XML processing for profile: Base document [/home/affinium7/mas/glassfish/lib/install/templates/default-domain.xml.template]. Profile name
property [domain.xml.style-sheets].
[exec] Security Store uses: JKS
[exec] File {0} not found.
[exec] CLI130 Could not create domain, domain1
BUILD FAILED
/home/affinium7/mas/glassfish/setup.xml:177: The following error occurred while executing this line:
/home/affinium7/mas/glassfish/setup.xml:607: exec returned: 1
Total time: 53 seconds
7. If you get the above error, it means .asadmintruststore was not created during installation and you will need to generate a new key. For full discussion on this, visit this post.
8. Run the following commmand to solve the problem:
keytool -genkey -keyalg RSA -keystore ~/.asadmintruststore -alias junk
9. Your actions will be as follows:
mclaren> keytool -genkey -keyalg RSA -keystore ~/.asadmintruststore -alias junk
Enter keystore password:
Re-enter new password:
What is your first and last name?
[Unknown]: XXX
What is the name of your organizational unit?
[Unknown]: Consumer Marketing
What is the name of your organization?
[Unknown]: XXX
What is the name of your City or Locality?
[Unknown]: Singapore
What is the name of your State or Province?
[Unknown]: Singapore
What is the two-letter country code for this unit?
[Unknown]: SG
Is CN=XXX, OU=Consumer Marketing, O=XXX, L=Singapore, ST=Singapore, C=SG correct? (type "yes" or "no")
[no]: yes
Enter key password for:
(RETURN if same as keystore password):
mclaren>
10. Once that is done, re-run the setup and your BUILD should be successful:
create.domain:
[exec] Using port 4848 for Admin.
[exec] Using port 8080 for HTTP Instance.
[exec] Using port 7676 for JMS.
[exec] Using port 3700 for IIOP.
[exec] Using port 8181 for HTTP_SSL.
[exec] Using default port 3820 for IIOP_SSL.
[exec] Using default port 3920 for IIOP_MUTUALAUTH.
[exec] Using default port 8686 for JMX_ADMIN.
[exec] Domain being created with profile:developer, as specified by variable AS_ADMIN_PROFILE in configuration file.
[exec] ------ Using Profile [developer] to create the domain ------
[exec] XML processing for profile: Base document [/home/affinium7/mas/glassfish/lib/install/templates/default-domain.xml.template]. Profile name [developer]. Processing property [domain.xml.style-sheets].
[exec] Security Store uses: JKS
[exec] Domain domain1 created.
[exec] Login information relevant to admin user name [admin] for this domain [domain1] stored at [/home/affinium7/.asadminpass] successfully.
[exec] Make sure that this file remains protected. Information stored in this file will be used by asadmin commands to manage this domain.
[delete] Deleting: /home/affinium7/mas/glassfish/passfile
BUILD SUCCESSFUL
Total time: 36 seconds
11. To start the app server:
cd glassfish/bin
asadmin start-domain
Domain domain1 is ready to receive client requests. Additional services are being started in background.
Domain [domain1] is running [Sun GlassFish Enterprise Server v2.1 (9.1.1) (build b60e-fcs)] with its configuration and logs at: [/home/affinium7/mas/glassfish/domains].
Admin Console is available at [http://localhost:4848].
Use the same port [4848] for "asadmin" commands.
User web applications are available at these URLs:
[http://localhost:8080 https://localhost:8181 ].
Following web-contexts are available:
[/web1 /__wstx-services HelloWorldService ].
Standard JMX Clients (like JConsole) can connect to JMXServiceURL:
[service:jmx:rmi:///jndi/rmi://mclaren:8686/jmxrmi] for domain management purposes.
Domain listens on at least following ports for connections:
[8080 8181 4848 3700 3820 3920 8686 ].
Domain does not support application server clusters and other standalone instances.
12. The default ports are:
admin port: 4848
app port: 8080
13. The default login to the admin server is
User: admin
Password: adminamin
Here's another good link that documents the installation/configuration of Glassfish. Click here.
1. Install JDK 1.5 or 1.6. You can download this from IBM AIX website.
2. Download Glassfish bundle from here. For AIX, downloaded glassfish-installer-v2.1-b60e-aix.jar size (61M). Note: ml stands for multi-language
3. Run the following command
% java -Xmx256m -jar glassfish-installer-v2.1-b60e-aix.jar
This command will unbundle GlassFish and create a new directory structure rooted under a directory named 'glassfish'.
4. CD to the glassfish subdirectory.
% cd glassfish
5. Set the execute permission for the Ant binaries that are included with the GlassFish bundle.
% chmod -R +x lib/ant/bin
% lib/ant/bin/ant -f setup.xml
6. On AIX, you may run into the following error:
create.domain:
[exec] Using port 4848 for Admin.
[exec] Using port 8080 for HTTP Instance.
[exec] Using port 7676 for JMS.
[exec] Using port 3700 for IIOP.
[exec] Using port 8181 for HTTP_SSL.
[exec] Using default port 3820 for IIOP_SSL.
[exec] Using default port 3920 for IIOP_MUTUALAUTH.
[exec] Using default port 8686 for JMX_ADMIN.
[exec] Domain being created with profile:developer, as specified by variable AS_ADMIN_PROFILE in configuration file.
[exec] ------ Using Profile [developer] to create the domain ------
[exec] XML processing for profile: Base document [/home/affinium7/mas/glassfish/lib/install/templates/default-domain.xml.template]. Profile name
property [domain.xml.style-sheets].
[exec] Security Store uses: JKS
[exec] File {0} not found.
[exec] CLI130 Could not create domain, domain1
BUILD FAILED
/home/affinium7/mas/glassfish/setup.xml:177: The following error occurred while executing this line:
/home/affinium7/mas/glassfish/setup.xml:607: exec returned: 1
Total time: 53 seconds
7. If you get the above error, it means .asadmintruststore was not created during installation and you will need to generate a new key. For full discussion on this, visit this post.
8. Run the following commmand to solve the problem:
keytool -genkey -keyalg RSA -keystore ~/.asadmintruststore -alias junk
9. Your actions will be as follows:
mclaren> keytool -genkey -keyalg RSA -keystore ~/.asadmintruststore -alias junk
Enter keystore password:
Re-enter new password:
What is your first and last name?
[Unknown]: XXX
What is the name of your organizational unit?
[Unknown]: Consumer Marketing
What is the name of your organization?
[Unknown]: XXX
What is the name of your City or Locality?
[Unknown]: Singapore
What is the name of your State or Province?
[Unknown]: Singapore
What is the two-letter country code for this unit?
[Unknown]: SG
Is CN=XXX, OU=Consumer Marketing, O=XXX, L=Singapore, ST=Singapore, C=SG correct? (type "yes" or "no")
[no]: yes
Enter key password for
(RETURN if same as keystore password):
mclaren>
10. Once that is done, re-run the setup and your BUILD should be successful:
create.domain:
[exec] Using port 4848 for Admin.
[exec] Using port 8080 for HTTP Instance.
[exec] Using port 7676 for JMS.
[exec] Using port 3700 for IIOP.
[exec] Using port 8181 for HTTP_SSL.
[exec] Using default port 3820 for IIOP_SSL.
[exec] Using default port 3920 for IIOP_MUTUALAUTH.
[exec] Using default port 8686 for JMX_ADMIN.
[exec] Domain being created with profile:developer, as specified by variable AS_ADMIN_PROFILE in configuration file.
[exec] ------ Using Profile [developer] to create the domain ------
[exec] XML processing for profile: Base document [/home/affinium7/mas/glassfish/lib/install/templates/default-domain.xml.template]. Profile name [developer]. Processing property [domain.xml.style-sheets].
[exec] Security Store uses: JKS
[exec] Domain domain1 created.
[exec] Login information relevant to admin user name [admin] for this domain [domain1] stored at [/home/affinium7/.asadminpass] successfully.
[exec] Make sure that this file remains protected. Information stored in this file will be used by asadmin commands to manage this domain.
[delete] Deleting: /home/affinium7/mas/glassfish/passfile
BUILD SUCCESSFUL
Total time: 36 seconds
11. To start the app server:
cd glassfish/bin
asadmin start-domain
Domain domain1 is ready to receive client requests. Additional services are being started in background.
Domain [domain1] is running [Sun GlassFish Enterprise Server v2.1 (9.1.1) (build b60e-fcs)] with its configuration and logs at: [/home/affinium7/mas/glassfish/domains].
Admin Console is available at [http://localhost:4848].
Use the same port [4848] for "asadmin" commands.
User web applications are available at these URLs:
[http://localhost:8080 https://localhost:8181 ].
Following web-contexts are available:
[/web1 /__wstx-services HelloWorldService ].
Standard JMX Clients (like JConsole) can connect to JMXServiceURL:
[service:jmx:rmi:///jndi/rmi://mclaren:8686/jmxrmi] for domain management purposes.
Domain listens on at least following ports for connections:
[8080 8181 4848 3700 3820 3920 8686 ].
Domain does not support application server clusters and other standalone instances.
12. The default ports are:
admin port: 4848
app port: 8080
13. The default login to the admin server is
User: admin
Password: adminamin
Here's another good link that documents the installation/configuration of Glassfish. Click here.
Tuesday, May 19, 2009
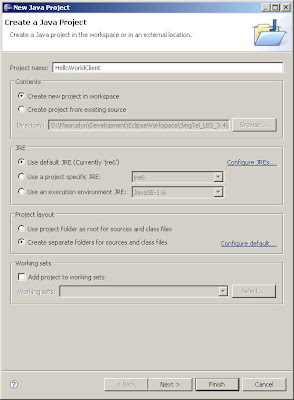
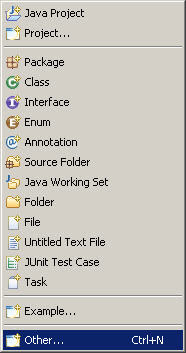
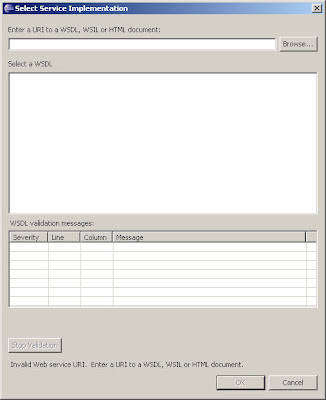
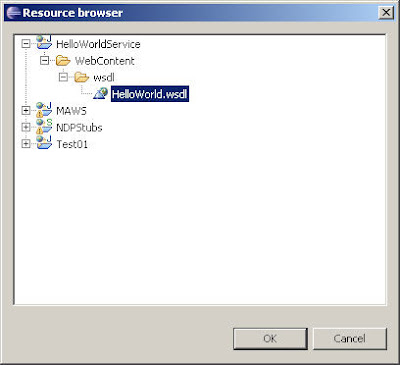
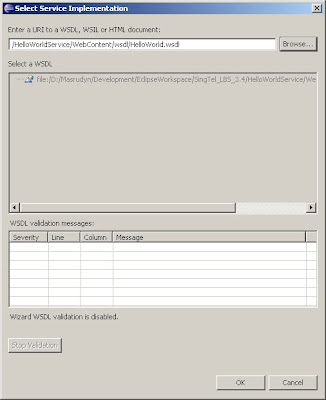
Creating HelloWorldClient using WTP
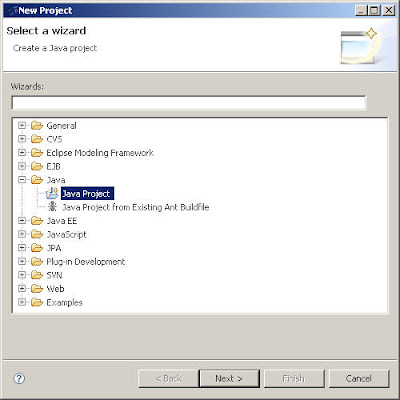
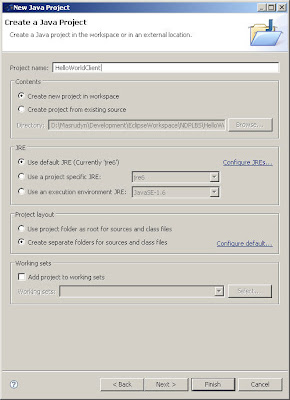
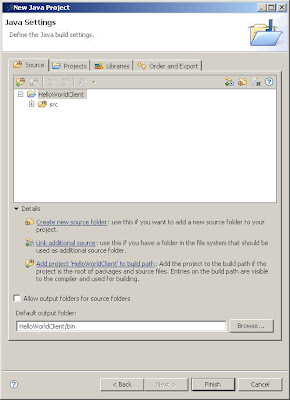
1. Create a new project for the HelloWorld client (an ordinary Java project is sufficient)
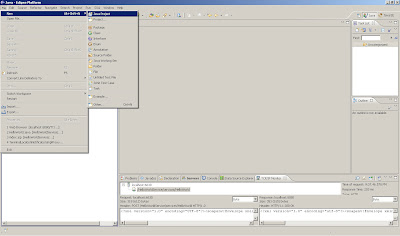
2. Create a Web Service Client

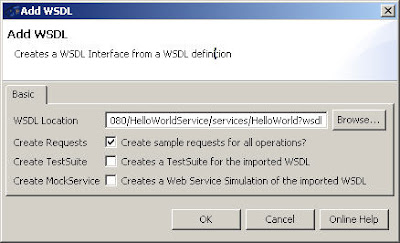
3. Click on browse and choose the WSDL location
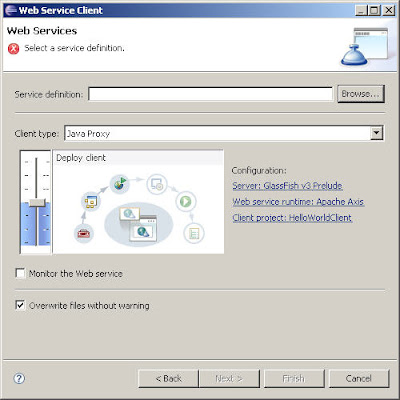
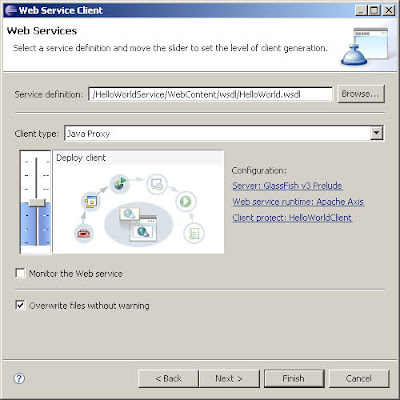
4. Increase the settings to "Test Client"
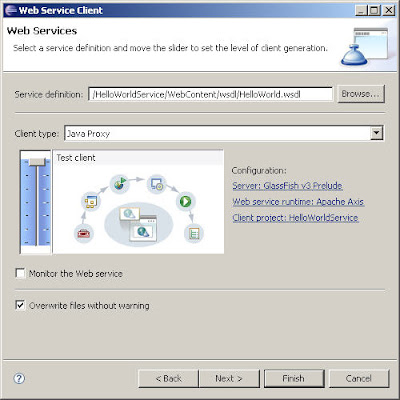
5. Choose Default settings and Click Next
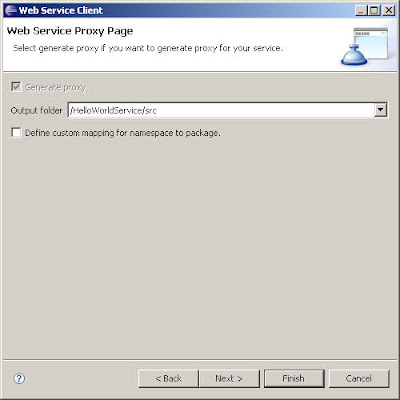
6. Choose Default settings and Click Finish
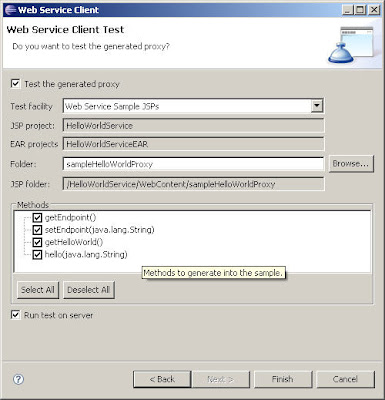
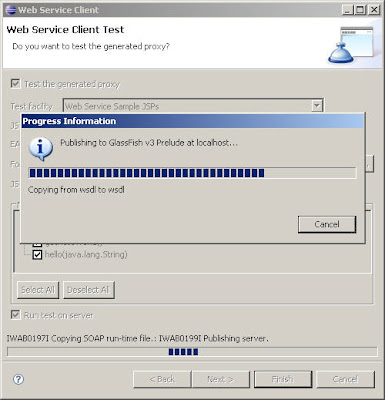
7. Eclipse will publish a test client to Glassfish
8. A test page will appear

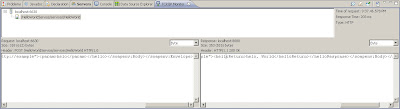
9. Check TCP/IP Monitor window to see if the SOAP calls are ok


2. Create a Web Service Client


3. Click on browse and choose the WSDL location


4. Increase the settings to "Test Client"

5. Choose Default settings and Click Next

6. Choose Default settings and Click Finish

7. Eclipse will publish a test client to Glassfish

8. A test page will appear

9. Check TCP/IP Monitor window to see if the SOAP calls are ok

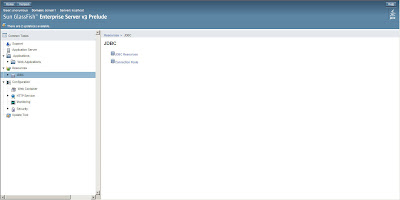
Configuring Oracle datasource on Glassfish
1. Stop Glassfish server and copy the database driver jar to /lib. (I am using ojdbc14.jar file)
2. Once copied to the lib dir, start Glassfish again. Reload the admin console and login.

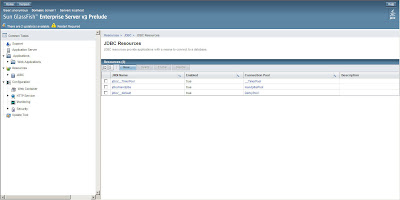
3. Expand the Resources menu item and then the JDBC menu item in the menu to the left. The JDBC menu contains two submenus, being JDBC Resources and Connection Pools. The JDBC Resource is exposed to (web) applications through JNDI. In order to create a JDBC Resource, we’ll need a Connection Pool first. To define an Oracle Connection Pool, click on connection Pools in the menu to the left.
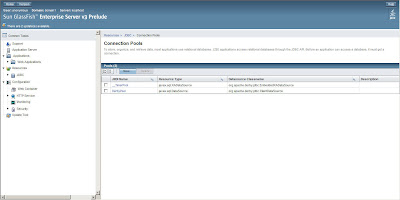
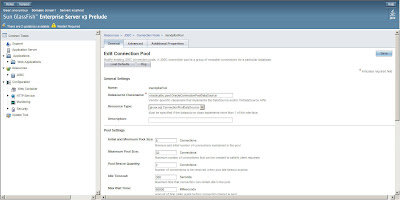
4. Next, click the New button to enter the Connection Pool wizard. The first thing to do is specify the Connection Pool Name, Resource Type and Database Vendor. The Resource Type should be javax.sql.ConnectionPoolDatasource. Select the database vendor from the select box. Since we are creating an Oracle connection pool, select Oracle and click the Next button.
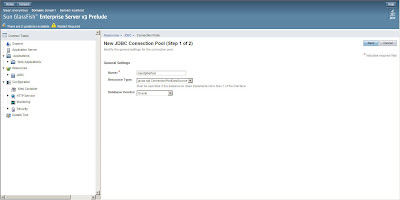
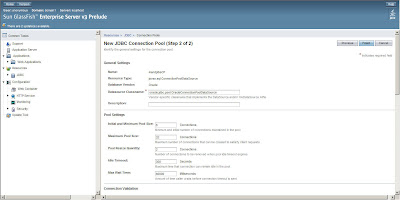
5. In the General Settings section, make sure the Datasource Classname is set to either oracle.jdbc.pool.OracleConnectionPoolDataSource (which is the default) or oracle.jdbc.xa.client.OracleXADataSource. Set all the other parameters as you like and scroll down to the Additional Properties section.
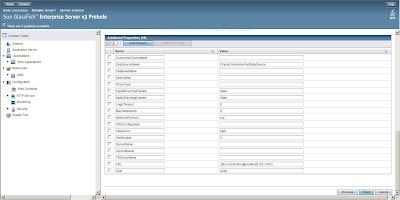
In this section, three or four properties are needed. All others can be discarded. The three needed ones are User, Password and URL. The fourth, optional, property is xa-driver-does-not-support-non-tx-operations. This property is only needed if both non-XA and XA connections are retrieved from the same connection pool.
So, specify the username, password and url. The last one is of the form jdbc:oracle:thin:@:: where usually is 1521. E.g. jdbc:oracle:thin:@pagani_s1:1521:ORCL
6. After specifying these properties, click Finish. This will bring you back to the connection Pool overview. Click on the Connection Pool name you just created and then the Ping button to see if the connection can be established.
7. If you see Ping Succeeded the connection pool has been setup correctly.

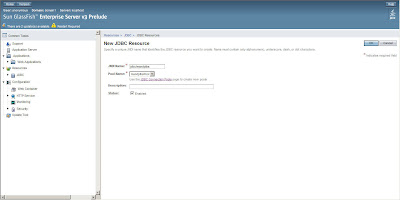
8. Now click on the JDBC Resources menu item in the menu to the left and then on the New button to create a new JDBC Resource.


9.Enter the name for the JDBC Resource and bear in mind that JNDI JDBC datasource names usually start with "jdbc/" so enter a name like "jdbc/mandplbs" or so. Also select the Connection Pool name you just created and successfully pinged from the select box. Hit the OK button and you’re done.


2. Once copied to the lib dir, start Glassfish again. Reload the admin console and login.

3. Expand the Resources menu item and then the JDBC menu item in the menu to the left. The JDBC menu contains two submenus, being JDBC Resources and Connection Pools. The JDBC Resource is exposed to (web) applications through JNDI. In order to create a JDBC Resource, we’ll need a Connection Pool first. To define an Oracle Connection Pool, click on connection Pools in the menu to the left.


4. Next, click the New button to enter the Connection Pool wizard. The first thing to do is specify the Connection Pool Name, Resource Type and Database Vendor. The Resource Type should be javax.sql.ConnectionPoolDatasource. Select the database vendor from the select box. Since we are creating an Oracle connection pool, select Oracle and click the Next button.

5. In the General Settings section, make sure the Datasource Classname is set to either oracle.jdbc.pool.OracleConnectionPoolDataSource (which is the default) or oracle.jdbc.xa.client.OracleXADataSource. Set all the other parameters as you like and scroll down to the Additional Properties section.
In this section, three or four properties are needed. All others can be discarded. The three needed ones are User, Password and URL. The fourth, optional, property is xa-driver-does-not-support-non-tx-operations. This property is only needed if both non-XA and XA connections are retrieved from the same connection pool.
So, specify the username, password and url. The last one is of the form jdbc:oracle:thin:@


6. After specifying these properties, click Finish. This will bring you back to the connection Pool overview. Click on the Connection Pool name you just created and then the Ping button to see if the connection can be established.

7. If you see Ping Succeeded the connection pool has been setup correctly.

8. Now click on the JDBC Resources menu item in the menu to the left and then on the New button to create a new JDBC Resource.


9.Enter the name for the JDBC Resource and bear in mind that JNDI JDBC datasource names usually start with "jdbc/" so enter a name like "jdbc/mandplbs" or so. Also select the Connection Pool name you just created and successfully pinged from the select box. Hit the OK button and you’re done.


Monday, May 18, 2009
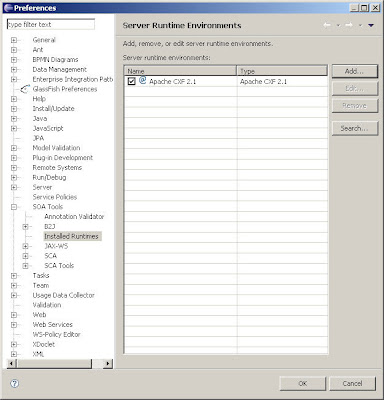
Configuring Apache CXF on Eclipse
1. Install Apache CXF. If you haven't, follow the steps here.
2. In Eclipse, go to Windows -> Preferences

3. Go to SOA Tools -> Installed Runtimes
4. Select Apache CXF 2.1
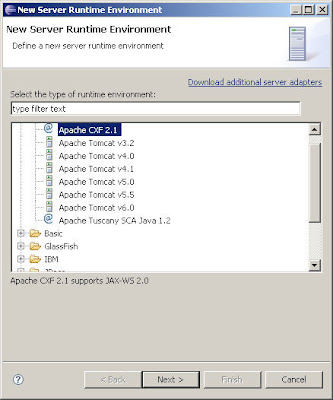
5. Set the appropriate paths to your Apache CXF install directory
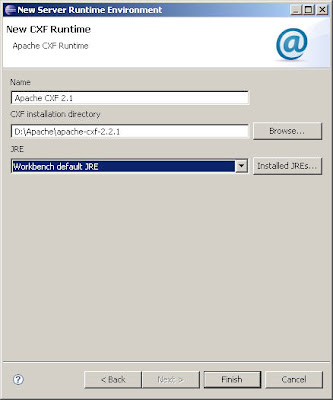
6. You will the Apache CXF Runtime added
2. In Eclipse, go to Windows -> Preferences

3. Go to SOA Tools -> Installed Runtimes

4. Select Apache CXF 2.1

5. Set the appropriate paths to your Apache CXF install directory

6. You will the Apache CXF Runtime added

Installing STP on Eclipse
Repeat the same steps as mention this link (Installing WTP on Eclipse).
The only difference is enter this URL in Step 2:
http://download.eclipse.org/stp/updates
Note: You might need the Equinox plugin for STP if it is not installed yet. You can get it from here.
The only difference is enter this URL in Step 2:
http://download.eclipse.org/stp/updates
Note: You might need the Equinox plugin for STP if it is not installed yet. You can get it from here.
Installing WTP on Eclipse
Here's how you setup Web Tools Platform (WTP) on Eclipse
1. In Eclipse, go to Help -> Software Updates -> Available Software
2. Enter the following URL:
http://download.eclipse.org/webtools/milestones
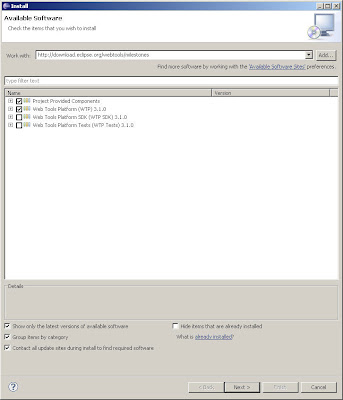
3. Install the components:
Project Provided Components
Web Tools Platform (WTP) 3.1.0

1. In Eclipse, go to Help -> Software Updates -> Available Software

2. Enter the following URL:
http://download.eclipse.org/webtools/milestones

3. Install the components:
Project Provided Components
Web Tools Platform (WTP) 3.1.0

Glassfish V3 Prelude + Eclipse Error: java.err.nojdk
If you are getting the error when running Glassfish V3 Prelude in Eclipse:
org.apache.jasper.JasperException: java.err.nojdk
at org.apache.jasper.compiler.DefaultErrorHandler.jspError(DefaultErrorHandler.java:89)
at org.apache.jasper.compiler.ErrorDispatcher.dispatch(ErrorDispatcher.java:375)
at org.apache.jasper.compiler.ErrorDispatcher.jspError(ErrorDispatcher.java:116)
at org.apache.jasper.compiler.Jsr199JavaCompiler.compile(Jsr199JavaCompiler.java:195)
at org.apache.jasper.compiler.Compiler.generateClass(Compiler.java:361)
at org.apache.jasper.compiler.Compiler.compile(Compiler.java:430)
at org.apache.jasper.JspCompilationContext.compile(JspCompilationContext.java:608)
at org.apache.jasper.servlet.JspServletWrapper.service(JspServletWrapper.java:374)
at org.apache.jasper.servlet.JspServlet.serviceJspFile(JspServlet.java:473)
at org.apache.jasper.servlet.JspServlet.service(JspServlet.java:366)
at javax.servlet.http.HttpServlet.service(HttpServlet.java:847)
at org.apache.catalina.core.ApplicationFilterChain.servletService(ApplicationFilterChain.java:431)
at org.apache.catalina.core.StandardWrapperValve.preInvoke(StandardWrapperValve.java:462)
at org.apache.catalina.core.StandardWrapperValve.invoke(StandardWrapperValve.java:139)
at org.apache.catalina.core.StandardContextValve.invoke(StandardContextValve.java:186)
at org.apache.catalina.core.StandardPipeline.doInvoke(StandardPipeline.java:719)
at org.apache.catalina.core.StandardPipeline.doInvoke(StandardPipeline.java:657)
at com.sun.enterprise.web.WebPipeline.invoke(WebPipeline.java:96)
at com.sun.enterprise.web.PESessionLockingStandardPipeline.invoke(PESessionLockingStandardPipeline.java:98)
at org.apache.catalina.core.StandardHostValve.invoke(StandardHostValve.java:187)
at org.apache.catalina.core.StandardPipeline.doInvoke(StandardPipeline.java:719)
at org.apache.catalina.core.StandardPipeline.doInvoke(StandardPipeline.java:657)
at org.apache.catalina.core.StandardPipeline.invoke(StandardPipeline.java:651)
at org.apache.catalina.core.ContainerBase.invoke(ContainerBase.java:1030)
at org.apache.catalina.core.StandardEngineValve.invoke(StandardEngineValve.java:142)
at org.apache.catalina.core.StandardPipeline.doInvoke(StandardPipeline.java:719)
at org.apache.catalina.core.StandardPipeline.doInvoke(StandardPipeline.java:657)
at org.apache.catalina.core.StandardPipeline.invoke(StandardPipeline.java:651)
at org.apache.catalina.core.ContainerBase.invoke(ContainerBase.java:1030)
at org.apache.catalina.connector.CoyoteAdapter.doService(CoyoteAdapter.java:325)
at org.apache.catalina.connector.CoyoteAdapter.service(CoyoteAdapter.java:242)
at com.sun.enterprise.v3.services.impl.ContainerMapper.service(ContainerMapper.java:180)
at com.sun.grizzly.http.DefaultProcessorTask.invokeAdapter(DefaultProcessorTask.java:633)
at com.sun.grizzly.http.DefaultProcessorTask.doProcess(DefaultProcessorTask.java:570)
at com.sun.grizzly.http.DefaultProcessorTask.process(DefaultProcessorTask.java:827)
at com.sun.grizzly.http.DefaultProtocolFilter.execute(DefaultProtocolFilter.java:152)
at com.sun.enterprise.v3.services.impl.GlassfishProtocolChain.executeProtocolFilter(GlassfishProtocolChain.java:71)
at com.sun.grizzly.DefaultProtocolChain.execute(DefaultProtocolChain.java:103)
at com.sun.grizzly.DefaultProtocolChain.execute(DefaultProtocolChain.java:89)
at com.sun.grizzly.http.HttpProtocolChain.execute(HttpProtocolChain.java:76)
at com.sun.grizzly.ProtocolChainContextTask.doCall(ProtocolChainContextTask.java:67)
at com.sun.grizzly.SelectionKeyContextTask.call(SelectionKeyContextTask.java:56)
at com.sun.grizzly.util.WorkerThreadImpl.processTask(WorkerThreadImpl.java:325)
at com.sun.grizzly.util.WorkerThreadImpl.run(WorkerThreadImpl.java:184)
The cause of the error is that while launching application; the server is not able to find the jdk version, instead its trying to launch application using jre version that it has used while launching itself.
You have 2 solutions:
1. Add JDK is to your system path:
a. JAVA_HOME=c:\java\jdk
b. PATH=c:\java\jdk\bin;
In windows; it can be done Right Click Computer Icon -> Advanced -> Environment Variables(System)
OR
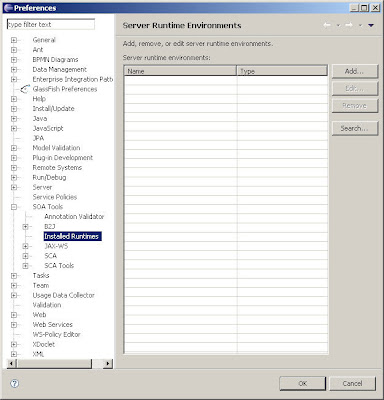
2. Add the JDK environment in Eclipse:
Window -> Preferences -> Java -> Installed JREs
See screenshot below:
Remember to restart Eclipse and then Glassfish server via the plugin in Eclipse after making the changes.
org.apache.jasper.JasperException: java.err.nojdk
at org.apache.jasper.compiler.DefaultErrorHandler.jspError(DefaultErrorHandler.java:89)
at org.apache.jasper.compiler.ErrorDispatcher.dispatch(ErrorDispatcher.java:375)
at org.apache.jasper.compiler.ErrorDispatcher.jspError(ErrorDispatcher.java:116)
at org.apache.jasper.compiler.Jsr199JavaCompiler.compile(Jsr199JavaCompiler.java:195)
at org.apache.jasper.compiler.Compiler.generateClass(Compiler.java:361)
at org.apache.jasper.compiler.Compiler.compile(Compiler.java:430)
at org.apache.jasper.JspCompilationContext.compile(JspCompilationContext.java:608)
at org.apache.jasper.servlet.JspServletWrapper.service(JspServletWrapper.java:374)
at org.apache.jasper.servlet.JspServlet.serviceJspFile(JspServlet.java:473)
at org.apache.jasper.servlet.JspServlet.service(JspServlet.java:366)
at javax.servlet.http.HttpServlet.service(HttpServlet.java:847)
at org.apache.catalina.core.ApplicationFilterChain.servletService(ApplicationFilterChain.java:431)
at org.apache.catalina.core.StandardWrapperValve.preInvoke(StandardWrapperValve.java:462)
at org.apache.catalina.core.StandardWrapperValve.invoke(StandardWrapperValve.java:139)
at org.apache.catalina.core.StandardContextValve.invoke(StandardContextValve.java:186)
at org.apache.catalina.core.StandardPipeline.doInvoke(StandardPipeline.java:719)
at org.apache.catalina.core.StandardPipeline.doInvoke(StandardPipeline.java:657)
at com.sun.enterprise.web.WebPipeline.invoke(WebPipeline.java:96)
at com.sun.enterprise.web.PESessionLockingStandardPipeline.invoke(PESessionLockingStandardPipeline.java:98)
at org.apache.catalina.core.StandardHostValve.invoke(StandardHostValve.java:187)
at org.apache.catalina.core.StandardPipeline.doInvoke(StandardPipeline.java:719)
at org.apache.catalina.core.StandardPipeline.doInvoke(StandardPipeline.java:657)
at org.apache.catalina.core.StandardPipeline.invoke(StandardPipeline.java:651)
at org.apache.catalina.core.ContainerBase.invoke(ContainerBase.java:1030)
at org.apache.catalina.core.StandardEngineValve.invoke(StandardEngineValve.java:142)
at org.apache.catalina.core.StandardPipeline.doInvoke(StandardPipeline.java:719)
at org.apache.catalina.core.StandardPipeline.doInvoke(StandardPipeline.java:657)
at org.apache.catalina.core.StandardPipeline.invoke(StandardPipeline.java:651)
at org.apache.catalina.core.ContainerBase.invoke(ContainerBase.java:1030)
at org.apache.catalina.connector.CoyoteAdapter.doService(CoyoteAdapter.java:325)
at org.apache.catalina.connector.CoyoteAdapter.service(CoyoteAdapter.java:242)
at com.sun.enterprise.v3.services.impl.ContainerMapper.service(ContainerMapper.java:180)
at com.sun.grizzly.http.DefaultProcessorTask.invokeAdapter(DefaultProcessorTask.java:633)
at com.sun.grizzly.http.DefaultProcessorTask.doProcess(DefaultProcessorTask.java:570)
at com.sun.grizzly.http.DefaultProcessorTask.process(DefaultProcessorTask.java:827)
at com.sun.grizzly.http.DefaultProtocolFilter.execute(DefaultProtocolFilter.java:152)
at com.sun.enterprise.v3.services.impl.GlassfishProtocolChain.executeProtocolFilter(GlassfishProtocolChain.java:71)
at com.sun.grizzly.DefaultProtocolChain.execute(DefaultProtocolChain.java:103)
at com.sun.grizzly.DefaultProtocolChain.execute(DefaultProtocolChain.java:89)
at com.sun.grizzly.http.HttpProtocolChain.execute(HttpProtocolChain.java:76)
at com.sun.grizzly.ProtocolChainContextTask.doCall(ProtocolChainContextTask.java:67)
at com.sun.grizzly.SelectionKeyContextTask.call(SelectionKeyContextTask.java:56)
at com.sun.grizzly.util.WorkerThreadImpl.processTask(WorkerThreadImpl.java:325)
at com.sun.grizzly.util.WorkerThreadImpl.run(WorkerThreadImpl.java:184)
The cause of the error is that while launching application; the server is not able to find the jdk version, instead its trying to launch application using jre version that it has used while launching itself.
You have 2 solutions:
1. Add JDK is to your system path:
a. JAVA_HOME=c:\java\jdk
b. PATH=c:\java\jdk\bin;
In windows; it can be done Right Click Computer Icon -> Advanced -> Environment Variables(System)
OR
2. Add the JDK environment in Eclipse:
Window -> Preferences -> Java -> Installed JREs
See screenshot below:

Remember to restart Eclipse and then Glassfish server via the plugin in Eclipse after making the changes.
Saturday, May 16, 2009
What if I did not use the Glassfish Eclipse bundle?
Friday, May 15, 2009
Setting up Apache CXF
1. Download Apache CXF from here. I'm using 2.2.1
2. Unzip the file to a dir eg. mine is in D:\Apache\apache-cxf-2.2.1
3. To setup eclipse with CXF:
Install the following plugins as instructed in here
http://eclipse-cs.sourceforge.net/update
http://pmd.sourceforge.net/eclipse
http://subclipse.tigris.org/update_1.4.x
2. Unzip the file to a dir eg. mine is in D:\Apache\apache-cxf-2.2.1
3. To setup eclipse with CXF:
Install the following plugins as instructed in here
http://eclipse-cs.sourceforge.net/update
http://pmd.sourceforge.net/eclipse
http://subclipse.tigris.org/update_1.4.x
Do not use STP in Eclipse for JAX-WS
It seems like using STP in Eclipse is the way to go for building webservices with JAX-WS but it's support has been discontinued:
http://www.eclipse.org/newsportal/article.php?id=773&group=eclipse.stp#773
Here's a very good demo though:
http://download.eclipse.org/stp/documents/europa/stp_europa_servicecreation_jaxws.htm
Tutorials:
http://www.ibm.com/developerworks/edu/os-dw-os-eclipse-soatp.html
Potential Problems:
http://techtracer.com/2007/08/26/eclipse-europa-has-ruined-my-day/
http://www.eclipse.org/newsportal/article.php?id=773&group=eclipse.stp#773
http://www.eclipse.org/newsportal/article.php?id=773&group=eclipse.stp#773
Here's a very good demo though:
http://download.eclipse.org/stp/documents/europa/stp_europa_servicecreation_jaxws.htm
Tutorials:
http://www.ibm.com/developerworks/edu/os-dw-os-eclipse-soatp.html
Potential Problems:
http://techtracer.com/2007/08/26/eclipse-europa-has-ruined-my-day/
http://www.eclipse.org/newsportal/article.php?id=773&group=eclipse.stp#773
Installing JAX-WS
Currently, I am using JAX-WS 2.1.7. You can get it from here.
1. Download JAX-WS binary from https://jax-ws.dev.java.net/2.1.7/
2. Execute this jar as java -jar JAXWS2.1.7-20090419.jar
3. A subdirectory \jaxws-ri will be created (you can copy this to another location later)
4 Add in the following environment variables in wsgen.bat and wsimport.bat in the bin dir:
(For example)
set JAXWS_HOME=D:\Apache\jaxws-ri
set JAVA_HOME=C:\Program Files\Java\jdk1.6.0_13
5. Remember to use the JAXWS_HOME path in eclipse.
Wednesday, May 13, 2009
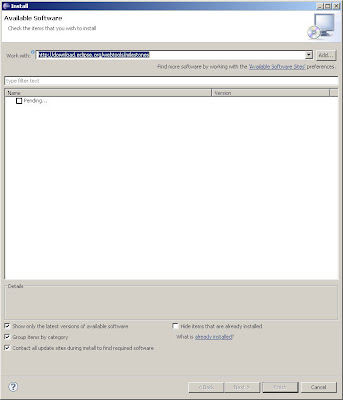
Installing SOAP UI Plugin on Eclipse Galileo
I have an earlier post on this but I thought I'd show how it's done on Galileo (Eclipse 3.5)
1. Goto Help -> Install Software
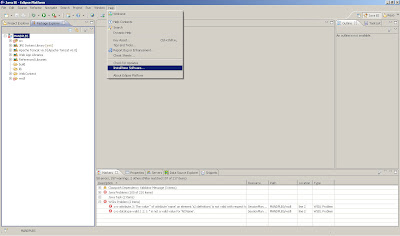
2. Enter http://www.soapui.org/eclipse/update/site.xm in the "Work with" and click on Add button
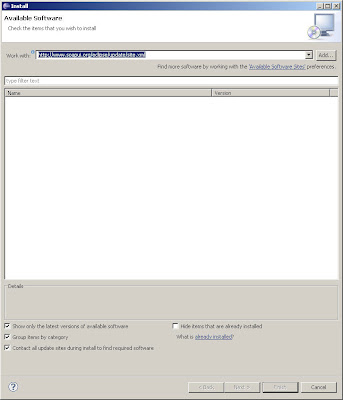
3. Check SOAP UI and Click on Next
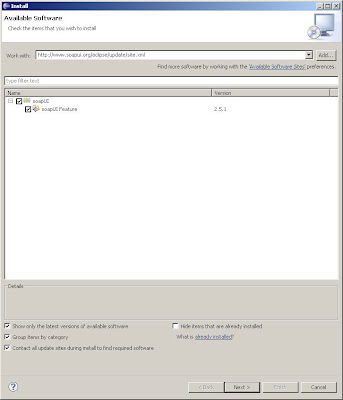
4. Click on Next again

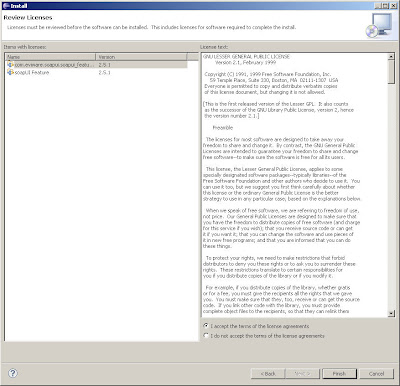
5. Check on "I agree with the terms of the license agreements" and click on Finish
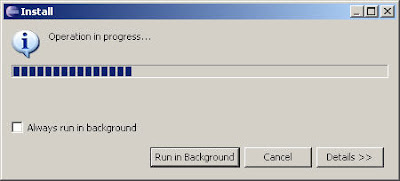
6. Installation will proceed
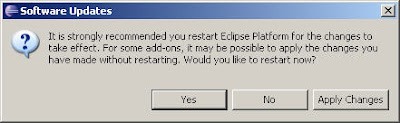
7. Restart Eclipse
That's it!
1. Goto Help -> Install Software

2. Enter http://www.soapui.org/eclipse/update/site.xm in the "Work with" and click on Add button

3. Check SOAP UI and Click on Next

4. Click on Next again

5. Check on "I agree with the terms of the license agreements" and click on Finish

6. Installation will proceed

7. Restart Eclipse

That's it!
Tuesday, May 12, 2009
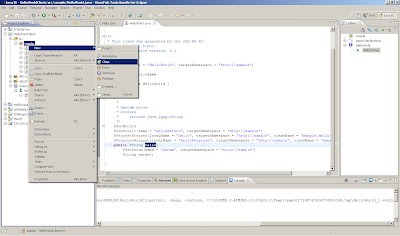
Creating HelloWorldClient using SOAP UI Plugin
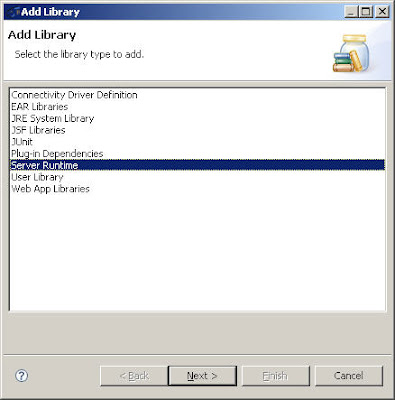
1. Create a new project for the HelloWorld client (an ordinary Java project is sufficient)

2. Next, we add Glassfish v2 as Server Runtime in Build Path.
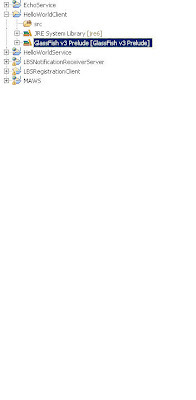
3. Right click->BuildPath->Add Library->ServerRuntime->Glassfish v2
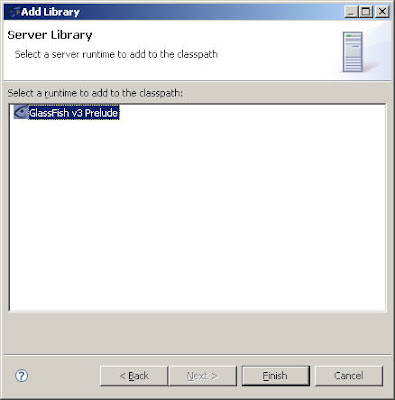
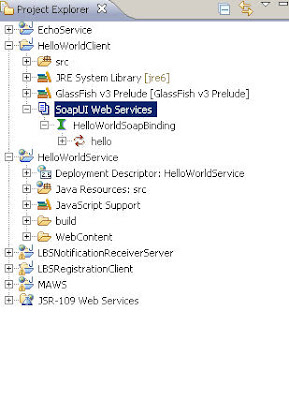
4. Select the project and Right Click->Soap UI->Add SOAPUI Nature, SOAP UI WebService item will be added in Project Explorer
(Goto Package Explorer if you don't see the Soap UI menu item)
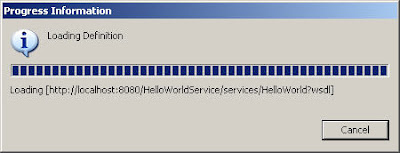
5. Right Click on SOAP UI and add the WSDL location
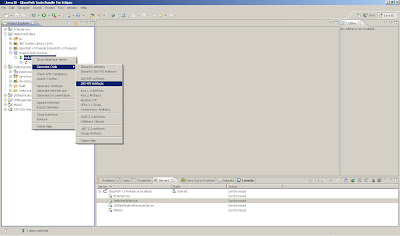
6. Select HelloWorldSoapBinding and Right Click->GenerateCode->JAX-WS Artifacts
Enter the appropriate info in the JAX-WS Artifacts window (note you might need to enter full paths if the files are not generated)
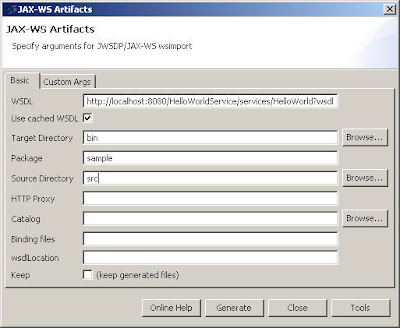
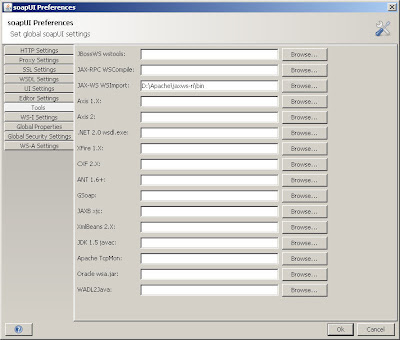
7. Click Tools and enter the location of JAX-WS Wsimport, for example c:\glassfish\bin and Click OK
8. Ensure (keep generated class) is checked, then click Generate on JAX-WS Artifacts window, it will display a dialog box that the operation was successful. Switch back to Java Perspective, then refresh the src folder and you can see the wsimport generated classes
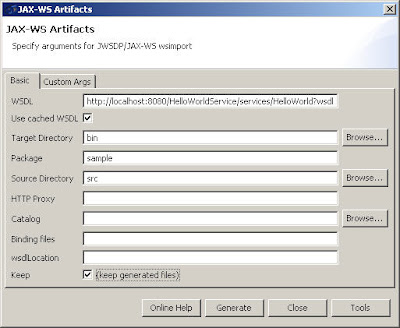

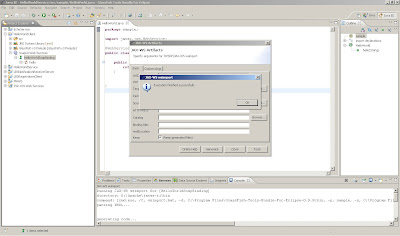
9. Click Generate on JAX-WS Artifacts window, it will display a dialog box that the operation was successful. Switch back to Java Perspective, then refresh the src folder and you can see the wsimport generated classes
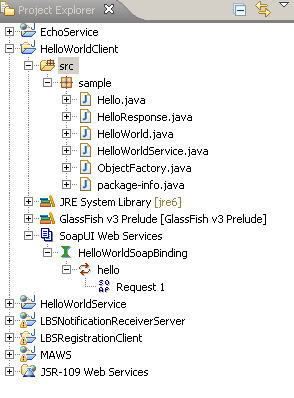
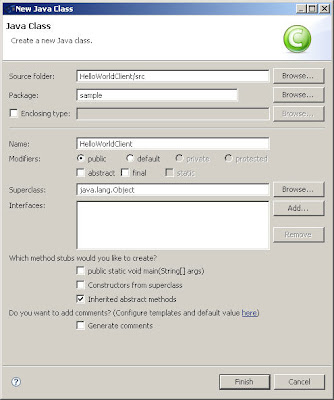
10. Implement your client code by adding a new class HelloWorldClient
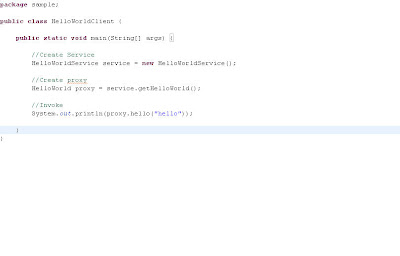
Code:
package sample;
public class HelloWorldClient {
public static void main(String[] args) {
//Create Service
HelloWorldService service = new HelloWorldService();
//Create proxy
HelloWorld proxy = service.getHelloWorld();
//Invoke
System.out.println(proxy.hello("hello"));
}
}
11. Execute the client by selecting the HelloWorldClient in the package explorer of Eclipse and selecting Run>Java Application. In the console window of Eclipse, you should see "Hello World".
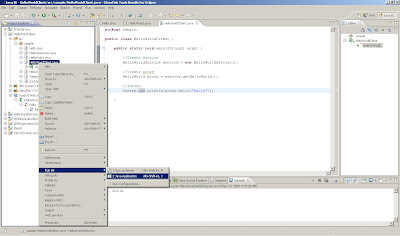

That's it! :-)


2. Next, we add Glassfish v2 as Server Runtime in Build Path.
3. Right click->BuildPath->Add Library->ServerRuntime->Glassfish v2


4. Select the project and Right Click->Soap UI->Add SOAPUI Nature, SOAP UI WebService item will be added in Project Explorer
(Goto Package Explorer if you don't see the Soap UI menu item)
5. Right Click on SOAP UI and add the WSDL location


6. Select HelloWorldSoapBinding and Right Click->GenerateCode->JAX-WS Artifacts
Enter the appropriate info in the JAX-WS Artifacts window (note you might need to enter full paths if the files are not generated)


7. Click Tools and enter the location of JAX-WS Wsimport, for example c:\glassfish\bin and Click OK

8. Ensure (keep generated class) is checked, then click Generate on JAX-WS Artifacts window, it will display a dialog box that the operation was successful. Switch back to Java Perspective, then refresh the src folder and you can see the wsimport generated classes


9. Click Generate on JAX-WS Artifacts window, it will display a dialog box that the operation was successful. Switch back to Java Perspective, then refresh the src folder and you can see the wsimport generated classes

10. Implement your client code by adding a new class HelloWorldClient


Code:
package sample;
public class HelloWorldClient {
public static void main(String[] args) {
//Create Service
HelloWorldService service = new HelloWorldService();
//Create proxy
HelloWorld proxy = service.getHelloWorld();
//Invoke
System.out.println(proxy.hello("hello"));
}
}
11. Execute the client by selecting the HelloWorldClient in the package explorer of Eclipse and selecting Run>Java Application. In the console window of Eclipse, you should see "Hello World".


That's it! :-)
Subscribe to:
Posts (Atom)